Showing posts with label Winter. Show all posts

Wednesday, February 16, 2011

Lemon Meringue Pie


Isn't it great how nature provides plentiful amounts of lemons just when most of us are in need of some bright, colorful tartness in our lives? I, personally, love lemony things in the chilly days of late winter and early spring, and one of my all-time favorite lemon applications is lemon meringue pie. I find that February's grey skies aren't so bad when some of this pie is in my world.

As I'm sure you gathered from the above paragraph, I love love love lemon meringue pie. I actually love any pie (except pecan), but this one is definitely in the top 3. It has the tasty, flaky crust, accompanied by a silken layer of tart lemonyness, all crowned with a fluffy, foamy meringue. I love to put a piece in my mouth and savor the way the little meringue bubbles pop all over my tongue, while the lemon curd and pie pastry make all of my other tastebuds explode. It's like you not only have the fireworks, you have the world-class symphony orchestra playing John Philip Sousa in the background.


I think that this is a great recipe for lemon meringue pie, and honestly, I've never felt the need to try another. Cook's Illustrated recipes tend to have science on their side, which is particularly helpful when you're dealing with potentially flavorless crust, melting lemon curd, and deflating meringue.

This recipe uses some special ingredients to keep the lemon in its place, and to prevent the meringue from melting in to a pool of separated egg whites. As long as you don't cut in to the pie before it's cooled (like I did, because I'm impatient), you'll have a perfect lemon meringue pie on your hands.


Lemon Meringue Pie
(Adapted a Teeny Bit from Cook's Illustrated)

Crust
  • 1 1/4 cups all-purpose flour, plus more for rolling out the dough
  • 1 tablespoon sugar
  • 1 teaspoon salt
  • 3 tablespoons vegetable shortening, cut into 1/2-inch pieces and chilled
  • 4 tablespoons (1/2 stick) unsalted butter, cut into 1/4-inch pieces and chilled
  • 4 to 6 tablespoons ice water

Filling
  • 1 1/2 cups cold water
  • 1 cup sugar
  • 1/4 cup cornstarch
  • 1/8 teaspoon salt
  • 6 large egg yolks
  • 1 tablespoon (packed) grated lemon zest (from about 3 large lemons)
  • 1/2 cup fresh lemon juice (from about 3 large lemons)
  • 2 tablespoons unsalted butter

Meringue
  • 1/3 cup water
  • 1 tablespoon cornstarch
  • 4 large egg whites
  • 1/2 teaspoon vanilla extract
  • 1/2 cup sugar
  • 1/4 teaspoon cream of tartar

Process the flour, sugar, and salt in a food processor until combined. Scatter the shortening over the top and continue to process until the mixture has the texture of coarse sand, about 5 seconds. Scatter the butter pieces over top and, using short pulses, process the mixture until it resembles coarse crumbs, about 5 pulses. Transfer to a large bowl.

Sprinkle 4 tablespoons ice water over the mixture. Stir and press the dough together using a stiff rubber spatula, until the dough sticks together. If the dough does not come together, stir in the remaining water, 1 tablespoon at a time, until it does. Try your best not to over-handle the dough. Form the dough into a 4-inch disk , wrap tightly in plastic wrap, and refrigerate at least 1 hour.

Let the chilled dough soften slightly at room temperature before rolling it into a 12-inch circle and fitting it into a pie plate. Trim, fold, and crimp the edges and freeze the unbaked pie crust until firm, about 30 minutes. Adjust the oven rack to the lower-middle position and heat the oven to 375 degrees. Line the chilled crust with aluminum foil and fill with pie weights (beans or rice work). 

Bake until the pie dough looks dry and is light in color, 25 to 30 minutes. Remove the pie weights and foil and continue to bake until the crust is a deep golden brown, about 12 minutes longer. Set the pie on a wire rack to cool.

Adjust the oven rack to the middle position and heat the oven to 325 degrees.

For the filling: Combine the water, sugar, cornstarch, and salt in a large nonreactive saucepan over medium heat and bring to a simmer while whisking constantly. When the mixture starts to turn translucent, whisk in the egg yolks, 2 at a time. Whisk in the zest, then the lemon juice, and finally the butter. 

Return the mixture to a full simmer, then remove the pan from the heat. Lay a sheet of plastic wrap flush to the surface of the filling to keep it hot while making the meringue.

For the meringue: Bring the water and cornstarch to a simmer in a small saucepan over medium-high heat, whisking frequently. When the mixture turns translucent and begins to bubble, remove it from the heat.

Whip the egg whites and vanilla in a large bowl with an electric mixer on low speed until frothy. Mix the sugar and cream of tartar together, then add it to the egg whites, 1 tablespoon at a time. Increase the speed to medium and whip the egg whites until soft peaks form. 

Add the cooked cornstarch mixture to the whipped egg whites, 1 tablespoon at a time, and contunue to whip the egg whites until they are glossy and form stiff peaks. Remove the plastic wrap from the lemon filling and return to very low heat to rewarm, for about a minute.

Pour the hot filling into the baked, cooled pie crust. Dollop and spread the meringue over the top of the pie, making sure to adhere the meringue to the crust. Using the back of a spoon, make attractive peaks in the meringue.

Bake until the meringue is golden brown, about 20 minutes. Transfer the pie to a wire rack and cool to room temperature before serving.


Monday, February 7, 2011

Winter Salads


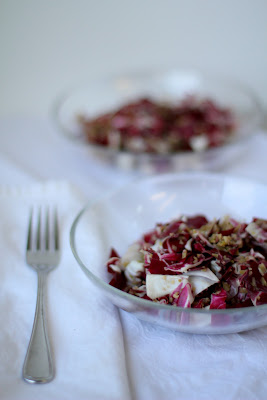
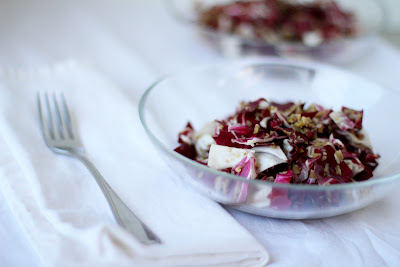
At this time of year, in order to keep myself sane, I need to work to find things that I like about winter. Some of those things are fires on cold nights, citrus, skiing, and winter salads. In fact, I might like winter salads better than summer salads, and it's really a relief that something is better in the winter than in the summer. I would say that the lack of bugs is another thing that's better in the winter, but there are currently stinkbugs in my house, so that one no longer applies.

Call me crazy, but winter salads tend to have a crunch, a bitterness, and a heartiness that's missing in the more delicate (dare I say wimpier) summer salads. I find them more interesting than salads made from wilty little green leaves because they have so much more character and personality. They're not always easy to get along with, but it's worth making the effort. 

After the holidays I really need to take a break from cookies and creamy things, and these flavor-packed salads get me wanting to eat salads, as opposed to eating them because I think I should because I'm a fatty. I recommend that you give these salads a try--their peppery bite just might add some needed brightness to your gray days. They work for me.


Radicchio Salad with Green Olives
(By Molly Watson of The Dinner Files)

Serves 2-4 
  • 1 head radicchio
  • 18 green olives
  • 1 teeny glove garlic
  • 2 tablespoons olive oil
  • 2 tablespoons lemon juice or sherry vinegar
  • A pinch of sugar
  • Salt to taste
  • Freshly ground black pepper to taste
  • Freshly grated Parmesan for garnish (optional)

Trim radicchio and cut or tear into bite-size pieces, and place in a large bowl. Mince the olives and garlic into a paste and mix with the lemon juice or vinegar, and the sugar, salt, and pepper. (I actually do all of this in a little food processor, and I don't add pepper because radicchio leaves are so peppery.)

Toss the radicchio with the dressing, and divide amongst the serving bowls. Top with Parmesan if you like. (I actually find that it's not necessary.)


Endive Salad with Walnuts
(By Molly Watson, of The Dinner Files)
Makes 4-6 Servings
  • 4 heads Belgian endive
  • 1/2 cup chopped walnuts
  • 3 tablespoons walnut oil
  • 1 tablespoon lemon juice, cider vinegar, or white vinegar
  • 1 teaspoon whole grain mustard
  • 1 teaspoon Dijon mustard
  • Salt and pepper to taste

Toast the walnuts in a toaster oven or a 350 degree oven. Trim the ends of the endives, and chop or slice them into bite-sized pieces.

In a large bowl, whisk together the oil, lemon juice or vinegar, and the mustards. Add salt and pepper to taste (I actually find that pepper is not necessary.) Add the endives and toss until thoroughly coated. Divide the salad into serving bowls and top with the toasted walnuts.


Wednesday, January 26, 2011

Parsley Walnut Pesto


Is there anything better than the smell of fresh basil in the summertime? My porch becomes a little piece of heaven when it overflows with flowers and smells of basil. Unfortunately, there comes a time when my lush, leafy basil stalks turn to brown woody ones that smell of decaying basil, so into the dumpster they go. The circle of life.

But then there comes a time when I want some pasta but I'm sick of tomato sauce and can't afford the calories packed into a cream sauce. I could of course go to the grocery store and pay an obscene amount of money for enough fresh basil to make some pesto, but looking back upon the abundance of the summer makes such a prospect just too painful.

So how about some parsley walnut pesto? It's just as delicious as basil pesto, but won't make you yearn for a summer season that's months away. And because parsley is cheaper than basil and walnuts are cheaper than pine nuts, it's economical, too!


Parsley Walnut Pesto
  • 2 cups loosely-packed flat-leaf parsley leaves
  • 3/4 cup toasted chopped walnuts
  • 1/2 cup grated Parmesan cheese
  • 2 large cloves garlic, crushed
  • 2 tablespoons fresh lemon juice, plus more to taste
  • 1/2 teaspoon salt
  • 1/2 teaspoon freshly ground black pepper
  • 1 cup extra-virgin olive oil
Place parsley, walnuts, cheese, garlic, lemon juice, salt, and pepper in the bowl of a food processor fitted with a metal blade. Pulse until well combined.

With the food processor running, add the olive oil in a slow stream. You may need as little as half a cup, so go slowly, and stop when the pesto reaches a consistency that works for you. Taste for seasoning, and add more salt, pepper, and lemon juice as needed.

This pesto doesn't discolor as easily as basil pesto does, but it's still best to use it within a couple days. Of course, you can always divide it into small portions, place those portions in little plastic bags, and freeze it all for a few months. As needed, remove a bag of pesto from the freezer; it will defrost very quickly.

Friday, December 10, 2010

Aged Eggnog


I love eggnog. It's one of those love/hate kind of things, and I'm firmly in the love camp; it makes me feel all warm and fuzzy inside, and while this might sound cheesy, it gets me in the holiday spirit.

I used to make the Cook's Illustrated recipe, which is delicious, but it's pretty time-consuming because you basically pasteurize the eggs and dairy by heating it all over a very low flame until it reaches a certain temperature. It takes forever, and if you rush it at all, or forget to stir for even a few minutes, you can end up with a curdly mess.

I did that one year, and it made me sad. So when I read about the concept of aged eggnog on Chow.com, I was super excited; not only because it sounds virtually fool-proof, but because I'm lazy.

You see, for this aged eggnog, you mix a few things together and throw them into jars, which then go in the fridge for up to a year. That's it! And just like what happens with the bourbon balls, the aging process tames the harsh bite of the alcohol and makes the eggnog deliciously smooth and mellow.

I'm going to write a disclaimer here, as you'll see on every website that has this recipe: You're taking raw eggs, cream, and milk, and letting it sit for at least a month and up to a year, which would probably cause the FDA to collectively have a heart attack.

The theory behind this technique, though, is that the large amount of alcohol in the mix prevents any nastiness from forming. Plus, in order for anything like salmonella to fester in there, it would have had to be present in the eggs or milk in the first place, which is unlikely. But if rawness scares you, you should try a pasteurized eggnog recipe. Me, I like to live on the edge.


Aged Eggnog
(From Chow.com)
  • 12 large eggs 
  • 2 cups sugar 
  • 1 cup heavy cream 
  • 1 quart (4 cups) whole milk 
  • 1 liter (about 4 cups) bourbon, such as Jim Beam 
  • 1/2 cup dark rum 
  • 1/2 to 1 cup good Cognac or other brandy 
  • Pinch kosher salt 
  • 1 whole nutmeg

To serve (optional):

  • 10 egg whites
  • 1 1/2 cups heavy cream

  • Separate egg yolks and whites. Combine yolks and sugar in a large mixing bowl and whisk until well blended and creamy. Add heavy cream, milk, bourbon, rum, Cognac, and salt, and mix to combine. Bottle it right away and refrigerate it until it’s ready. You can use an old liquor bottle, washed out jars from pasta sauce (like I did), or any other largeish glass vessel.
Allow the eggnog to age for at least 3 weeks and up to a year. (You'll note an improvement after only a week, and it keeps getting better from there.)
 
To serve, pour over ice and grate some fresh nutmeg over the top. If you only have the pre-ground stuff, skip it, and get some whole nutmeg the next time you go to the store. Or, if you want to serve the eggnog in the traditional way, pour it into a punch bowl. In separate bowls, whip 10 egg whites and 1 1/2 cups heavy cream to soft peaks and fold them into the eggnog. Serve in punch cups, garnished with freshly grated nutmeg.


Chocolate Bourbon Balls


If you have bourbon lovers in your familly, you must make this recipe. And you should do it soon, because these no-bake cookies need to age in order to achieve their full, well-rounded potential.

Because these bourbon balls are constructed from pre-made cookies and no perishable ingredients, they can be stored in a cool, dry place for several months. As they age, the sharp edges of the bourbon are smoothed away, and the texture of the bourbon balls improves and becomes smoothly dense. The molasses, cinnamon, ginger, and cloves combine to make that sort of warming winter flavor that makes you feel like you're curled up in front of a roaring fire. These are not treats for kids, though--they still pack a punch.

There are, of course, many recipes for bourbon balls out there. However, every other recipe that I was able to find either called for butter (which would make them less shelf-stable); powdery, metallicy cocoa; or vanilla wafers. Vanilla!? Who wants vanilla bourbon balls? Chocolate and bourbon were made for each other; add some molasses and pecans, and you've got a party.

So really--enlist some help (this is the kind of recipe that's fun to make with another person), roll up your sleeves (it's messy), and get these little nuggets aging in order to have them ready for Christmas.


 Bourbon Balls
(From The Gourmet Cookie Book)

  • 1/2 cup chopped raisins
  • 1/4 cup bourbon
  • 2 cups chocolate wafer crumbs
  • 1/2 cup firmly packed dark brown sugar
  • 1/2 cup finely chopped pecans, plus about another 3/4 cup for rolling the balls
  • 1/4 cup unsulfured molasses
  • 1/2 teaspoon cinnamon
  • 1/2 teaspoon ground ginger
  • 1/4 teaspoon ground cloves

In a small bowl, let the raisins macerate in the bourbon for 15 minutes. In a large bowl, combine well all ingredients except the 3/4 cup chopped pecans for rolling. Form the mixture into 1-inch balls, and roll the balls in the finely chopped pecans. Store the bourbon balls in an airtight container in a cool dark place for at least 1 week before serving.


Tuesday, November 30, 2010

Sauerkraut


It's too late to make this sauerkraut for Thanksgiving, but sauerkraut with Thanksgiving dinner is apparently just a Baltimore thing, anyway. If you don't live in Baltimore and have never had sauerkraut as a part of your holiday spread, I would highly recommend that you try it next year--the tartness of the sauerkraut is a pleasing companion to the tart cranberry sauce. I love to take a bite of the stuffing, a bite of the tart sauerkraut, a bite of the turkey, followed by a bite of the tart cranberry sauce--it makes for such a nicely rounded dinner, and helps prevent tastebud fatigue.

While store-bought sauerkraut is vinegary and intense, home-made sauerkraut takes the same fermented, almost pickled cabbage taste, and treats it in a much more delicate, subtle manner, and the sauerkraut becomes almost effervescent. It's like moonshine made in the wilds of the Appalachians versus Baker's or Bookers whiskey. Or like grappa versus Grey Goose. Or like a pie bought at Walmart compared to a homemade pie made with fruits from your own tree...you get my point.

Not only is homemade sauerkraut delicious, it couldn't be simpler--you basically cut up a head of cabbage, toss it with some salt, smoosh it down every once in a while, and set it aside and mostly leave it alone. The most you'll have to do is occasionally scrape some of the scummy stuff off the top of the brine. It doesn't hurt anything, but it can apparently affect the taste of the sauerkraut. That, and you might want to move your setup outside if your house starts to smell like cabbage, especially if your house, like mine, frequently smells of cabbage anyway because your downstairs neighbors like to make their own kimchi. 

Sauerkraut
  • 5 pounds cabbage
  • 3 tablespoons kosher salt

Note: All of the recipes that I consulted directed that the cabbage be put in a crock (a vessel with a round opening and high, straight sides). I don't have a crock, nor do I know anyone who has such a thing, so I used a bowl. My plate fit snugly over the cabbage, so I figured it would work just fine. Perhaps there's a reason to use a crock, maybe it has something to do with evaporation, but I think you'll be okay if you decide to also go with a glass or ceramic bowl. You can even use a food-grade plastic bucket; just don't use metal, as it's reactive.

Remove any outer damaged or wilted leaves, but do not wash the cabbage--its natural bacteria is what's going to do the fermenting. Cut the head of cabbage into quarters and remove the hearts if you would like to, and thinly slice (or shred in a food processor)-you want the slices to be about the thickness of a nickel, ideally. Place the cabbage in the bowl or crock as you go, and sprinkle each layer with some of the salt. When all of the cabbage is in your bowl or crock, mix it up with your hands, then press down as hard as you can on it--you really want that cabbage smashed in there.

Cover the cabbage with a plate that fits snugly inside of your bowl or crock. Weight it with something heavy and clean, like a boiled rock, a big can of tomatoes, or a pitcher full of water. Cover it all with a dishtowel to prevent bugs and dust from getting in there. Let it sit for an hour and wilt. At the end of the hour, remove your weight and smash the cabbage down some more with your hands.

(This is what my setup looked like.)

Periodically, whenever you think of it, mash the cabbage down some more with your (clean) hands. By the next day, the cabbage should have exuded enough liquid that the cabbage is submerged. If not, dissolve a teaspoon of salt in a cup of water and pour it over the cabbage. Continue to do this until all of the cabbage is covered, and there's a bit of extra water over the top of the cabbage.

As the cabbage goes through its fermentation cycle, some water may evaporate, so you might have to periodically add more water. Also, check it every day or two, and remove the scum that has formed on the top. You won't be able to remove all of it, and that's okay--don't drive yourself crazy. The scum/mold is not harmful, and the cabbage is in an anaerobic environment, so nothing bad should be forming in the brine.

The cabbage will ferment more quickly if it's kept inside, but it can also be kept outside if the temperatures are above freezing. Some people claim that a slower fermentation makes for a tastier sauerkraut. In either case, your sauerkraut will be ready in about 3-6 weeks. Taste it occasionally to see how it's progressing, and when it's reached a stage of tanginess that you like, scoop it out into glass jars (with the brine), and store in the fridge.


Tuesday, November 9, 2010

Pasta with Oxtail Ragu


When I came home from the store the other day and announced excitedly that they now carry oxtails, Nick looked at me like I was crazy. And maybe I am, but this cheap, tough cut is much loved by Italian cooks and professional chefs alike. Mario Batali claims that it's the most flavorful part of the cow, so I just had to give it a try.

Because oxtails are tough, bony little critters, they require a braise. In this case, the braise was turned into a ragu, which is a thick, hearty pasta sauce. The stuff they sell in jars is not really ragu--it's tomato sauce. A ragu is a thick, chunky sauce that usually includes a mirepoix and and good bit of wine, but generally no ground beef. Also, it's generally cooked long enough to be considered a braise.

At this time of year, I just love to braise anything and everything, so you'll be seeing a lot of it around here. Braising makes the house smell wonderful for hours on end, and sitting by the fire on a cold night and enjoying those smells is just lovely.

I also love that you can make a braised meal and have the kitchen sparkling clean by the time the meal is ready. This makes braised dishes ideal for company, especially because the meal can even be prepared the day before, and if anything, it actually gets better.

I served this ragu with some homemade tagliatelli, but it would also be delicious incorporated into a simple lasagne. This amount of ragu is enough to lightly sauce four servings, or heavily sauce 2 servings of pasta, possibly with some left over. In the instructions below, I've written for enough pasta to serve 2 people with good appetites. If you would like 4-6 servings of pasta, use 400 grams of flour and 4 eggs.


Pasta with Oxtail Ragu

  • 2 1/2 pounds oxtail, cut into 2-4 inch pieces
  • Kosher salt and freshly ground black pepper
  • 1/4 cup canola oil
  • 1/2 cup all-purpose flour
  • 1 small parsnip, peeled and chopped
  • 1/2 small fennel bulb, chopped
  • 1 can (15 ounces) plum tomatoes
  • 2 cups dry red wine
  • 3 small rosemary sprigs
  • 3 sprigs oregano
  • 3 cloves garlic
  • 1 cup chicken stock or water
  • 200 grams all-purpose flour
  • 2 eggs
  • 1/2 teaspoon of a combination of chopped fresh rosemary and oregano
  • Pinch red pepper flakes
  • Balsamic vinegar*
Preheat the oven to 325 degrees.
Trim the oxtail of excess fat, and remove silverskin, if possible. Season with salt and pepper, and dredge in flour, shaking off the excess.

Heat 2 tablespoons oil in a 6-quart Dutch oven. When the oil shimmers, add the oxtail and brown on all sides. You will most likely have to do this in batches; add more oil to the pot as necessary. Transfer the oxtails to a plate.

Add the onion, parsnip, and fennel to the pan and saute over medium heat until soft and browned, about 7 minutes. Add the wine and increase the heat to high. Boil until reduced by about a fourth, about 5 minutes. As the wine reduces, scrape up the brown bits from the bottom of the pot.

While the tomatoes are still in the can, cut them into pieces with a pair of kitchen scissors. In a piece of cheesecloth, tie up the rosemary, oregano and garlic. Add this herb sachet and the tomatoes to the pot. Put the pieces of oxtail back in the pot.

If necessary, add enough water to come most of the way up the pieces of meat. Bring to a boil, cover, and place in the center of the oven. Cook until the oxtail is very tender and beginning to fall off the bones, about 3-4 hours. Check the meat halfway through the cooking time. If the liquid is no longer coming at least half way up the side of the oxtail pieces, add the chicken stock or water.

While the ragu is braising, make the pasta:
Mound the flour in the center of a large wooden board, and sprinkle it with the salt. Make a well in the center and add the eggs. Using a fork or your fingers, beat the eggs together, then, continuing to use a swirling motion, begin to incorporate the flour, starting with the inner rim of the well.

As you expand the well, keep pushing the flour up to retain the well shape. This takes some practice, and if the eggs break through the wall of the well, all is not lost--just try to combine the eggs and flour as well as you can.
 
When half of the flour is incorporated, the dough will begin to come together. Start kneading the dough, using primarily the palms of your hands. Once the dough is a cohesive mass, set the dough aside and scrape up and discard any dried bits of dough.

Lightly flour the board and continue kneading for 10 minutes, dusting the board with additional flour as necessary. The dough should be elastic, very smooth, and a little sticky. And seriously, this really takes 10 whole minutes--do not try to slack on this part, just find a Zen place and knead away. Wrap the dough in plastic wrap and allow to rest for 30 minutes at room temperature.

To roll out the pasta, divide it into 3 pieces (if you're using 200 grams of flour). Make the first piece into a flattish shape and cover the rest. With your plain roller set to the largest setting (lower number), pass the dough through once. Fold like a book (one flat piece in the back, and two pieces folded over on the sides so that they almost meet in the middle) and pass through again. Fold like a book and repeat 2 more times. After the last time, send the pasta through as is.

Then, put the roller on the next smallest setting and pass the dough through. Continue to do this on smaller and smaller settings until the pasta is the right thickness (I like a 6 or 7 on Kitchenaid stand mixers). Lay the dough out on a flat surface and cover with a towel so that it does not dry out, and repeat with the remaining lumps of dough.

When all of the pasta is laid out flat, switch to the fettuccine-cutting roller, and pass the pieces of dough through, one at a time. Sprinkle the dough with a little bit of flour so that the noodles don't stick together; cover with a towel so they do not dry out. 
 
When the meat is ready, remove the pot from the oven. Transfer the oxtail to a plate, and discard the herb sachet. Skim the fat off the surface. If the remaining liquid is not very thick, (ragus are very thick sauces), place the pot over a burner and boil until reduced to the proper consistency.

If you would like a fancier presentation, either use a stick blender to puree the sauce, or strain out the vegetables and puree them in a food processor; return to the pot. If you would like a more 'rustic' presentation, just leave the vegetables as they are.

When the sauce is the proper consistency and the meat is cool enough to handle, pick the meat off the bones and return to the pot. Let the meat warm through before serving. Add the red pepper flakes. Taste for seasoning, and add salt, pepper, and more red pepper flakes as needed. This dish is very good with a great deal of pepper.

In a large pot of boiling, salted water, cook the pasta until al dente, about 2-3 minutes. Drain the pasta and divide amongst the serving vessels of your choice. Spoon the ragu over the top of the pasta and serve. 

*The balsamic vinegar does not have a quantity listed, as I added a few drops only to my own portion. I thought that the dish needed some acidity, and I thought that balsamic would be just perfect, but too much vinegar could have ruined the dish for Nick. For the whole pot, you'll likely want to use about a 1/2 teaspoon. Start with that and taste for flavor; add more if you like.

Note: As I mentioned above, this dish can be better on the day after it's made. Making it the day before is also advantageous because you can skim the fat off the surface of the sauce, and when you pull apart the pieces of meat, you'll be better able to remove the extra fat.


Wednesday, February 10, 2010

Ropa Vieja

I think it's fun to emphatically shout "Ropa Vieja!" while attempting to roll the r's.

Nick thinks it's fun to ask "Donde es Tomatillo?" while looking at the fish tank. Tomatillo is a greenish/yellowish plecko; pleckos hide.

This isn't our particular plecko, but I couldn't get a picture of Tomatillo because he was hiding. He looks like this, though.

We should probably get out of the house. But guess what? There is way too much snow out there. We couldn't leave even if we wanted to. In fact, it's been declared a "Phase III," which means that no one but emergency vehicles are to be driving anywhere for any reason.

"Ropa Viejaaaa!!'

"Tomatillooooo!!"

I'm thinking Ropa Vieja because that's what's in the oven. Nick just likes his fish.

When planning for the upcoming snOMG/Snowverkill/Snowmageddon (I've been spending way too much time on Facebook), I was again looking for something that could cook all day but was relatively simple.

Ropa Vieja came to mind, partially because it's very simple, and partially because I was determined to make it delicious. I once worked in a Cuban restaurant that served this classic dish, and it sucked. However, most of the food in this restaurant sucked, which is why I made no money and left within a few months.

But I figured that anything that involves seared meat cooked forever with peppers, onions, jalapenos and spices can't suck if it's done properly, right?

Nick just yelled, "Toma-Mother-F#$%in'-Tillo!!"

He agrees. We're feeling the Latin vibe whilst being buried under snow.

So this recipe was started the night before it was to be cooked, when I coated some flank steak with oregano, jalepenos, garlic, and salt. It sat in the fridge all night while I stuffed my face with bacony spinachy crusty goodness.

Today, after Nick came in from the snow, the meat was brushed off and seared in the dutch oven. Then the sliced onions were added, and then the sliced peppers were added.

Nick would like to point out that HE sliced the peppers. He also seared the meat because he's the Meat Master. I know that sounds weird, but that's part of why it's funny, right? Why did Nick slice the peppers? Because I am not competent.

We ate shrimp fajitas the other day, and we had some green peppers that were soggy, and some that were raw. That's because even though I have pretty good knife skills, I'm too lazy to cut the peppers into a consistent size. That is why Nick sliced the peppers today.

We then added some sherry and let it come to a simmer. Then I was supposed to add 8 plum tomatoes that had been peeled, cored, and cut in half. By the way, Daniel Boulud also suggested that we peel the peppers. SO not happening.

I've mentioned before that I cannot bring myself to buy tomatoes in the depths of winter because they would be pointlessly expensive and flavorless.

So I added canned tomatoes but tried to rip them in half before adding them to the pot. This is what happened:

So I cleaned the stove for the third time in one day, added some water and bay leaves to the dutch oven, and it went into a 275 degree oven.

Yes, that is a very not hot oven.

That's why this timer says not 4 minutes, and not 4 o'clock, but 4 hours. And that's why it's a great snow day meal. Even a losing-your-mind-because it-won't-stop-snowing-day meal.

It actually stopped snowing right when we put the pot in the oven.

But it's supposed to start again in a few hours.

Nick just noted that I posted a snow day blog a few days ago with a picture of an almost snow-devoid porch. That's pretty funny now.

Like I said before, this is one of the things that's pretty cool about a braised meal:

Look at that spiffily clean kitchen.

So how was it? It was great. Comforting and tasty without being overwhelmingly heavy. This was a good thing, as I had done nothing but eat for the past few days.

It could have been a little heavier on the onions, and I knew this before putting it in the oven, but it wasn't exactly feasible to run out to the store to grab an onion.

With some lime juice, hot sauce, and a little bit of sour cream, it was nice and wintery yet reminiscent of summer.

It might not look all that appetizing, but it's supposed to be shreds of meat. Its name means 'old clothes' or 'old rags' depending on who is translating.

And, as is often the case with stews and braised dishes, it was even better the next day for breakfast.


Ropa Vieja
(Slightly Adapted from Braise)


  • 4 garlic cloves, peeled and chopped
  • 2 jalapeño peppers, chopped
  • 2 teaspoons dried oregano, preferably Cuban
  • 1 1/2 teaspoons Kosher salt, plus additional
  • 2 1/2 to 3 pound flank steak
  • 1 to 2 tablespoons extra virgin olive oil
  • 1 tablespoon unsalted butter
  • 2 medium Spanish onion, peeled, halved, and thinly sliced
  • 2 large green bell peppers, peeled (peeling is optional), cored, seeded, and thinly sliced
  • 1 rd bell pepper, peeled (peeling is optional), cored, seeded, and thinly sliced
  • 1/2 cup sherry
  • 1 28-ounce can whole tomatoes
  • 2 bay leaves
  • Freshly ground black pepper
  • Lime wedges, for serving


The day before you plan to make this dish, combine the garlic, jalapeños, oregano, and salt in a non-reactive container. Add the meat and rub the mixture all over it. Cover tightly with plastic wrap, and marinate overnight in the refrigerator.


Center a rack in the oven and preheat to 275 degrees.


Heat 1 tablespoon olive oil and the butter in a Dutch oven over high heat. Scrape the rub off the flank steak, and reserve. Add the flank steak to the pot and sear both sides until golden brown. Transfer the flank steak to a plate. 


If there is not enough fat in the pot, add another tablespoon of olive oil. Add the onions and cook until light golden brown. Add the bell peppers and cook for 5 minutes. Add the sherry and bring to a simmer, scraping up any brown bits on the bottom of the pot. 


With kitchen shears, cut the tomatoes into smaller pieces while they're still in the can. Add to the pot. Add 1 cup water, and the reserved rub. Return the flank steak to the pot, nestle it in amongst the vegetables, and add the bay leaves and salt and pepper to taste. Bring to a simmer.


Cover the pot with a tight-fitting lid and transfer to the oven, and braise until the meat is very tender, 3 1/2 to 4 hours, turning the steak every hour or so. The meat is ready when it is falling apart in to ropy shreds--thus the name, Ropa Vieja.


Erbazzone, or Herb Sandwich from Parma


WOW.

Wow that's a lot of snow, and wow I ate A LOT last night. It was just so good that I was not able to stop myself, even after I was so full I could barely move.

The problematic deliciousness was in the form of lots of spinach, cured pork product, and Parmesan wrapped in a pastry shell. Wow.

I love love love pie crust, which is why pie is so much better than cake. That's where this recipe started, with making the pie crust. Again, Mario tells me to cut in the butter with my fingers. So not happening. My food processor was one of the best $50 purchases I have ever made. I love you, food processor.

So while the dough was resting in the fridge, some finely minced bacon was sauteed. It was supposed to be pancetta, but blizzard #3 was approaching, and Whole Foods was too crowded to go wandering around in search of pancetta, and I did not intend to drive to Fresh Market for the pancetta that I know they have. Bacon was in the freezer, so bacon was in the herb sandwich.

Some onions were minced, and part of the onions, part of the bacon, some pepper and some garlic went into a separate bowl.

I suppose this was a way to add more flavor and texture when the pie/tart/sandwich was later assembled and cooked. I don't know.

The rest of the onions were sauteed with the "pancetta", and 2 pounds of spinach was added to the skillet. Two pounds of uncooked spinack takes up a lot of space, and Nick totally didn't believe me when I said that the spinach would cook down to a fraction of its original volume.

As I was pressing massive amounts of spinach into the skillet, I whispered to it, "Wilt! Don't prove me wrong!"

It wilted. I was supposed to add garlic at this point, but I forgot. Oops. I just added it later, because garlic is very necessary.

Holy cow. I just now noticed that the recipe instructs you to blanch the greens prior to adding them to the skillet. That makes so much more sense.

Even as I was shoving all of those greens into the skillet, I was thinking to myself that it would have made a lot more sense to have already blanched or steamed them. I was also thinking that the spinach released a TON of water, so why was Mario telling me that I might need to deglaze with water in order to get to the fond. Wow. I am such a genius.

Okay, so the spinach onion bacon mixture was allowed to cool a little, and the Parmesan, raw bacon and onion mix, and two eggs were stirred in.

The dough was then rolled out and the filling was placed on top. That is, the still-seeping filling that shouldn't have been seeping in the first place, but I didn't follow directions. I rock.


The second piece of rolled-out dough was placed on top and the edges were folded and crimped.


The sandwich baked for 20 minutes, at which point I brushed it with garlic oil and cooked it for 20 more minutes.

Reading this, it seems so quick and simple. Actually, though, it took forever. Nick and I usually eat late, but we ate very late last night. But when we did eat, wow I ate a lot. This pie/tart/sandwich thing was absolutely awesome. It smelled insanely good when it was taken out of the oven, and it did not disappoint.

Like I said, it was a combination of some of the best things in the whole world, so how could it not be great? I think I ate about 5,000 calories yesterday, but it doesn't count because it was a snow day. Right?

You're probably tired of hearing me talk about snow, right? And if you live in the Baltimore area, you're probably sick of dealing with snow.

This is blizzard #3 this year, and the second time in a week that a state of emergency and the hospital's corresponding code yellow have been called. Again, I am so lucky to not be stuck at work. Woo hoo.

Some Facebook buddies posted that we have now gotten more snow this year than both Buffalo and Alaska. That's totally crazy, but I believe it. Also, this is the most snowfall that this region has seen in recorded history.

Other Facebook people have published posts in which they detail the ways in which they are losing their minds. Especialy the people with kids. Even Nick is losing his mind because he's so bored.

Look:
He's out there shoveling in winds so strong that Facebookers are saying that it's scaring them. Apparently, the wind is strong enough to blow snow under the door and create a drift in the building's front entrance.

We had talked about building a snowman on the porch because that would be pretty cool, but I no longer know how to approach such an undertaking.

I guess we would first have to move that chest-high drift. Or maybe we could actually carve a snowman out of it.

I would just like to note, however, that I am not complaining about the snow (only because I haven't gotten stuck at work, knock on wood). I figure that if it has to be winter, it should be winter. It sucks when it's just cold and dreary. At least with all this snow it's less boring.

Speaking of bored, Nick's back, so it's time to cook more food.

Herb Sandwich from Parma

Erbazzone
(Slightly Adapted from Molto Italiano)


Dough

  • 2 cups all-purpose flour
  • 1/2 cup cake flour
  • 1 teaspoon salt
  • 5 tablespoons high-quality lard or unsalted butter, chilled
  • 3 tablespoons extra-virgin olive oil, chilled
  • 7 to 10 tablespoons cold water


Filling

  • 5 ounces thinly sliced pancetta, minced
  • 3 large garlic cloves, minced
  • 1 medium red onion, cut into a 1/4 inch dice
  • Freshly ground black pepper
  • 2 tablespoons extra-virgin olive oil
  • 2 1/2 pounds spinach, beet greens, or swiss chard leaves, or a blend, blanched in boiling water till barely wilted, drained, squeezed dry, and chopped
  • 1 cup Parmesan Reggiano 
  • Salt
  • 2 large eggs, beaten


Garlic Oil

  • 2 tablespoons high-quality lard or extra virgin olive oil
  • 1 clove garlic, minced


To make the dough, combine the flours and salt in a food processor and mix for a couple seconds. Add the olive oil (or lard) and the butter. Pulse a few times until the mixture resembles coarse crumbs. Move to a large mixing bowl and sprinkle with 7 tablespoons cold water. With a spatula, gently mix. If it is too dry, add more water, a little at a time. Gather the dough into a bowl, wrap with plastic wrap, and chill for at least 30 minutes.


To make the filling, in a small bowl, combine about 1/4 cup of the pancetta with a little of the garlic, about 1/4 cup of the onion, and a generous amount of pepper. Set aside.


Cook the remaining pancetta in the olive oil in a large skillet over medium-low heat until it has given off much of its fat, about 5 minutes. Add the remaining onion and cook, covered, for 15 minutes, or until the onion has softened.


Uncover, raise the heat to high, and cook until the filling is a rich golden brown. Add the spinach, reduce the heat to medium, and cook until the greens are tender, about 7 minutes if you're using one of the heartier greens. 


Stir in the remaining garlic and cook for another 30 seconds or so, until fragrant. If a brown glaze has formed on the skillet bottom, add a little water and simmer, scraping up the brown bits, until the water has evaporated. Turn the filling into a bowl and let it cool.


Add the Parmesan and the reserved pancetta mixture to the filling. Taste for seasoning and blend in the eggs.


Set a rack as close to the bottom of the oven as possible, and preheat the oven to 400 degrees.


For the garlic oil, combine the olive oil (or lard) and garlic in a small pan and heat over medium until fragrant. Remove from the heat.


Brush a 14-inch pizza pan with olive oil. Divide the dough in half. On a lightly floured surface, roll one piece to about a 14-inch circle, and place it on the pan. Spread the filling over the pastry, leaving about a 2-inch border.


Roll out the second piece of dough to a 14-inch round. Dampen the edges of the bottom crust with water, top with the second round of dough, and pinch the edges together. Fold the edges over toward the center of the torta, and crimp. Make a few slashes on the top of the crust for steam to escape.


Bake for 20 minutes. Brush the crust with the garlic oil, and bake for another 20 minutes, or until the top is pale gold and very crisp and the edges are golden brown. Cut into wedges to serve.