Showing posts with label Salad. Show all posts

Monday, February 7, 2011

Winter Salads


At this time of year, in order to keep myself sane, I need to work to find things that I like about winter. Some of those things are fires on cold nights, citrus, skiing, and winter salads. In fact, I might like winter salads better than summer salads, and it's really a relief that something is better in the winter than in the summer. I would say that the lack of bugs is another thing that's better in the winter, but there are currently stinkbugs in my house, so that one no longer applies.

Call me crazy, but winter salads tend to have a crunch, a bitterness, and a heartiness that's missing in the more delicate (dare I say wimpier) summer salads. I find them more interesting than salads made from wilty little green leaves because they have so much more character and personality. They're not always easy to get along with, but it's worth making the effort. 

After the holidays I really need to take a break from cookies and creamy things, and these flavor-packed salads get me wanting to eat salads, as opposed to eating them because I think I should because I'm a fatty. I recommend that you give these salads a try--their peppery bite just might add some needed brightness to your gray days. They work for me.


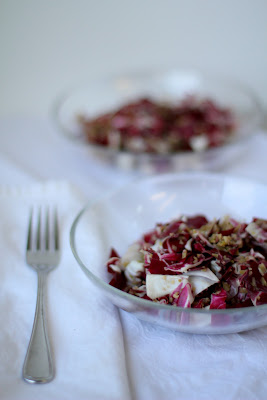
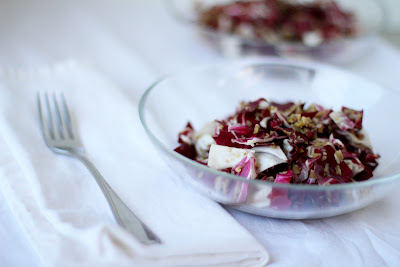
Radicchio Salad with Green Olives
(By Molly Watson of The Dinner Files)

Serves 2-4 
  • 1 head radicchio
  • 18 green olives
  • 1 teeny glove garlic
  • 2 tablespoons olive oil
  • 2 tablespoons lemon juice or sherry vinegar
  • A pinch of sugar
  • Salt to taste
  • Freshly ground black pepper to taste
  • Freshly grated Parmesan for garnish (optional)

Trim radicchio and cut or tear into bite-size pieces, and place in a large bowl. Mince the olives and garlic into a paste and mix with the lemon juice or vinegar, and the sugar, salt, and pepper. (I actually do all of this in a little food processor, and I don't add pepper because radicchio leaves are so peppery.)

Toss the radicchio with the dressing, and divide amongst the serving bowls. Top with Parmesan if you like. (I actually find that it's not necessary.)


Endive Salad with Walnuts
(By Molly Watson, of The Dinner Files)
Makes 4-6 Servings
  • 4 heads Belgian endive
  • 1/2 cup chopped walnuts
  • 3 tablespoons walnut oil
  • 1 tablespoon lemon juice, cider vinegar, or white vinegar
  • 1 teaspoon whole grain mustard
  • 1 teaspoon Dijon mustard
  • Salt and pepper to taste

Toast the walnuts in a toaster oven or a 350 degree oven. Trim the ends of the endives, and chop or slice them into bite-sized pieces.

In a large bowl, whisk together the oil, lemon juice or vinegar, and the mustards. Add salt and pepper to taste (I actually find that pepper is not necessary.) Add the endives and toss until thoroughly coated. Divide the salad into serving bowls and top with the toasted walnuts.


Sunday, August 22, 2010

Julia Child's Caesar Salad


There was a time when I didn't really like Caesar salads. I thought that they were one-dimensional, greasy, gloppy, and bland. Of course, there are plenty of Caesar salads out there that do fit this description, but there are also some exceptional and thoroughly delicious specimens. 

On the subject of Caesar salads, my mind was completely and forever changed when I tried the grilled Caesar salad at La Scala. This salad is a work of art--smoky but crisp lettuce draped with a creamy, luscious dressing with just enough of a hint of garlic and anchovy, topped with homemade breadcrumbs and exceptional Parmesan Reggiano.


Then there's the iconic steakhouse Caesar. I worked in fine dining steakhouses for a few years, and I suppose that in that time I became enamored of the concept of the old-school tableside presentation where the server cracked an egg in a wooden bowl and proceeded to make Caesar salad magic. 

As much as this bit of nostalgia struck my fancy, I was glad that our litigious society and large contingent of salmonella fearers had swept this step of service into the realm of antiquity. It was bad enough that I had to do a tableside bananas foster; I really didn't want to have to perform that Caesar salad bit. However, if I had, I would now know how to make the perfect Caesar salad. What I do know is how to make is a mediocre, campy dessert, and I know how to put out fires, thanks to frequently flambeing with a portable workstation.

I decided that I wanted to make an old school Caesar, and upon some recipe searching, I found that Julia Child and Jacques Pepin had the answer. In this recipe, you gently coddle an egg before embarking on  dressing-making alchemy, which may or may not pasteurize the egg a bit. Probably not, but it might make some people feel better. (I realize that the timing of this post is not ideal, as there is at this moment a huge recall on eggs due to salmonella contamination. If you buy some eggs from a small local producer, though, you should be fine. Or you could just wait a while to indulge in semi-raw egg preparations.)

The only thing missing in this recipe is some fishy goodness, so if I make it again, I'll probably slip some anchovy paste in there somewhere. And, I have to admit that I cut up the leaves. In the quote below, it is explained that this was not part of the original Caesar salad concept, but I just didn't feel like being that old-school.

Also posted below is a recipe for a more vinaigrette-style Caesar. I'm kind of a purist with this salad, and I think that a creamy dressing is generally the way to go, but I was pleasantly surprised by this non-creamy dressing. It grew on me with its bold, bright, assertive flavors, and I have to admit that it is in some ways easier to make than the Julia and Jacques concoction below. Plus, unlike Julia's version, you can whip up a batch of this dressing and have it on hand for whenever you want a quick, simple salad.


Julia's Caesar Salad
(From Epicurious, originally from Julia and Jacques Cooking at Home)
When Caesar Cardini first served his famous salad in the early 1920s, he used just the hearts of the romaine lettuce, the tender short leaves in the center, and he presented them whole. The salad was tossed and dressed, then arranged on each plate so that you could pick up a leaf by its short end and chew it down bit by bit, then pick up another. However, many customers didn't like to get their fingers covered with egg-and-cheese-and-garlic dressing, and he changed to the conventional torn leaf. Too bad, since the salad lost much of its individuality and drama. You can certainly serve it the original way at home — just provide your guests with plenty of big paper napkins. And plan to be extravagant.
  • 18 to 24 crisp, narrow leaves from the hearts of 2 heads of romaine lettuce, or a package of romaine hearts (about 1 pound)
  • 1 cup plain toasted croutons (recipe below)
  • 1 large clove garlic, peeled
  • 1/4 cup or more excellent olive oil
  • Salt
  • 1 large egg
  • freshly ground black pepper
  • 1 whole lemon, halved and seeded
  • Worcestershire sauce
  • 2 tablespoons freshly grated parmesan cheese, imported Parmigiano-Reggiano only
Preparing the salad components:
You will probably need 2 large heads of romaine for 3 people — or use a commercially prepared package of "romaine hearts," if they appear fresh and fine. From a large head remove the outside leaves until you get down to the cone where the leaves are 4 to 7 inches in length — you'll want 6 to 8 of these leaves per serving. Separate the leaves and wash them carefully to keep them whole, roll them loosely in clean towels, and keep refrigerated until serving time. (Save the remains for other salads — fortunately, romaine keeps reasonably well under refrigeration.


To flavor the croutons, crush the garlic clove with the flat of a chef's knife, sprinkle on 1/4 teaspoon of salt, and mince well. Pour about a tablespoon of olive oil on the garlic and mash again with the knife, rubbing and pressing to make a soft purée.


Scrape the purée into the frying pan, add another tablespoon of oil, and warm over low-medium heat. Add the croutons and toss for a minute or two to infuse them with the garlic oil, then remove from the heat. (For a milder garlic flavor, you can strain the purée though a small sieve into a pan before adding the extra croutons. Discard the bits of garlic.)


To coddle the egg, bring a small saucepan of water to a simmer. Pierce the large end of the egg with a pushpin to prevent cracking, then simmer for exactly 1 minute.


Mixing and serving the Caesar:
Dress the salad just before serving. Have ready all the dressing ingredients and a salad fork and spoon for tossing.


Drizzle 2 tablespoons of olive oil over the romaine leaves and toss to coat, lifting the leaves from the bottom and turning them towards you, so they tumble over like a wave. Sprinkle them with a generous pinch of salt and several grinds of pepper, toss once or twice, then add the lemon juice and several drops of the Worcestershire, and toss again. Taste for seasoning, and add more, if needed.


Crack the egg and drop it right on the romaine leaves, then toss to break it up and coat the leaves. Sprinkle on the cheese, toss briefly, then add the croutons (and the garlicky bits in the pan, if you wish) and toss for the last time, just to mix them into the salad.


Arrange 6 or more leaves in a single layer on individual plates, scatter the croutons all around, and serve.

Plain Toasted Croutons

  • 4 or more thick slices of home-style white bread 
Preheat the oven to 350°F. Remove the crusts from the bread and slice into 1/2-inch strips and then the strips into 1/2-inch cubes, to make 4 cups. Spread the cubes in a single layer on a cookie sheet and set in the oven for about 10 minutes, turning once or twice, until lightly toasted on all sides. Spread the cubes on a tray to cool before using or freezing.


Vinaigrette-Style Caesar Salad
(Slightly Adapted from Epicurious)

For the croutons
  • 2 tablespoons unsalted butter 
  • 2 tablespoons olive oil 
  • 2 garlic cloves, halved 
  • 3 cups 3/4-inch cubes of Italian or French bread 
For the dressing
  • 2 flat anchovy fillets, or to taste, rinsed and drained 
  • 4 garlic cloves 
  • 2 teaspoons Sherry vinegar 
  • 2 teaspoons fresh lemon juice 
  • 1 teaspoon Worcestershire sauce 
  • 1/2 teaspoon dry mustard 
  • 1 tablespoon mayonnaise 
  • 1/2 cup olive oil 
  • 4 heads of romaine, the pale-green inner leaves washed, spun dry, and torn into bite-size pieces (about 12 cups) and the outer leaves reserved for another use 
  • Parmesan curls formed with a vegetable peeler 
Make the croutons:
Preheat the oven or toaster oven to 350°F. In a small saucepan melt the butter with the oil, the garlic, and salt and pepper to taste over moderately low heat. Remove the mixture from the heat, let it stand for 10 minutes, and discard the garlic. In a bowl toss the bread cubes with the butter mixture, spread them on a baking sheet, and bake them in the middle of the oven for 12 to 15 minutes, or until they are golden. The croutons may be made 1 day in advance and kept in an airtight container.

Make the dressing:
Mince and mash the anchovies with the garlic to form a paste and in a bowl whisk together the paste, the vinegar, the lemon juice, the Worcestershire sauce, and the mustard. Add the oil in a stream, whisking, and whisk the dressing until it is emulsified.

In a large bowl toss the romaine with the croutons and the dressing until the salad is combined well and sprinkle the salad with the Parmesan curls.



Wednesday, March 31, 2010

Sauteed Halibut with Arugula, Roasted Beets, and Horseradish Creme Fraiche


Sprouts!


I can't wait till these little guys are strikingly tall zinnias burgeoning with big fluffy, bright flowers.

Like this:

These guys will be tasty and convenient herbs.


A lot of the 10X10 recipes call for small amounts of herbs that I don't use in great quantities. I therefore figured that it would be nice to grow herbs like sorrel, marjoram, and epazote, especially because these herbs often can't be found in the store. It's just not so fun to pick a recipe that depends on sorrel, finding that the store doesn't have it, and having to pick something else. Or, finding that they do have it, using a tiny bit, and letting the rest go to waste. I figure that purchases like that add up to the massive percentage of my paycheck that goes to food, so I'd rather spend $1.50 on the seeds one time, and never have to worry about buying the herb.

If you know me well, you know that I have had an on-going battle with squirrels for the past 15 years. It would take about 2,000 words to adequately describe the scope of these issues, but I will tell you that one year, a squirrel decided to bite all the heads off my little baby basil sprouts. It didn't eat the whole plant, just the heads, so I was left with all the sad little stalks valiantly but vainly poking their bodies out of the soil. When the squirrel dug up the lily bulbs and ate the tender tasty centers I found it annoying but somewhat understandable. But only the heads? Really? That's just perverse.


Or how about the time I tried those little mesh seed-thingies that you start inside and plant outside? That year, the squirrels dug them up, shredded them, and threw them all over the porch. They didn't eat those, either. That was just to mess with me. I could go on and on here, but I'll spare you. I won't mention the time they ate the Christmas lights, or the time I came home to find one in my bedroom...

Basically, that's why the sprouts have a squirrel guard. This squirrel is here to say that these sprouts are his, and the rest of you squirrels better back off.

The onion wanted to get in on the sprouting action, too.

All this springtime feeling got me wanting something light for dinner, and I'm a little obsessed with Sunday Suppers at Lucques right now, so I picked Suzanne Goin's recipe for sauteed halibut with arugula, roasted beets, and horseradish creme fraiche.

It started with coating a piece of halibut with lemon zest, thyme, and parsley.

That is one pretty fish fillet.
How did I zest a lemon when Thomas Keller stole my zester, you ask?

I used my spiffy new microplane zester! It has a handle. Oooohh.

So beets were roasted and sliced into wedges. They were then tossed with a dressing made from diced shallots, balsamic vinegar, red wine vinegar, olive oil, salt, and pepper.

The beets were plated on a bed of arugula and spring green mix. It was supposed to be straight baby arugula, but Whole Foods didn't have it, so the mix just had to do.

The fish was then burned in a skillet. Suzanne Goin tells you to put the skillet on high heat for two minutes, swirl in olive oil, and let it sit for another minute. Why I followed this direction, or the one that instructed me to make mayonnaise by hand, I do not know. This resulted in a very very charred exterior that tasted of Teflon rather than crispy fishy deliciousness.

It also meant that while the exterior was charred, the interior was raw. Had this been tuna, that would have been just fine. It wasn't tuna, though, and I became rather flustered, which resulted in very overcooked fish. I've really never been able to pan-sear fish. I can bake it, grill it, and poach it, but pan searing? Not so much.


I'll just add it to the List of Things Leah Can't Cook. That illustrious list includes duck in any form, pate choux (if I hear one more person say it's soooo easy, my head is going to explode), and souffles.

The halibut was plated and the whole dish was drizzled with a sauce made from creme fraiche, horseradish, lemon, salt and pepper.

Try to pretend that the fish isn't blackened, and it doesn't look like some sort of humpbacked whale beached on sands of lettuce and beets. Also, pretend that the plating and lighting don't suck. Thank you.

It tasted delicious, though. I already knew that I liked cream and beets together, and it turns out that horseradish is also delicious with beets. The meal wasn't overly heavy, but it was satisfying because of the sugary, earthy, starchy beets, and it was just right for very early spring. The pepperiness of the horseradish and arugula was nicely paired with the mildness of the fish and creme fraiche. Next time, though, I'll probably cut the beets into smaller shapes, and I'll try my best not to demolish the halibut fillet.


Sautéed Halibut with Arugula, Roasted Beets, and Horseradish Creme Fraiche

  • 6 halibut fillets
  • 1 lemon, zested
  • 1 tablespoon thyme leaves
  • 2 tablespoons coarsley chopped flat-leaf parsley
  • 2 tablespoons extra virgin olive oil
  • 4 ounces arugula, cleaned
  • Roasted Beets with Horseradish Creme Fraiche (recipe below)
  • 2 tablespoons olive oil, for drizzling
  • Kosher salt and freshly grouns black pepper

Season the fish with the lemon zest, thyme, and parsley. Cover and refrigerate at least 4 hours or overnight. Remove the fish from the refrigerator 15 minutes before cooking, to bring it to room temperature.


Heat a large sauté pan over high heat for 1 minute. Season the fish on both sides with salt and pepper. Swirl the olive oil into the pan, and when it's shimmering, carefully lay the fish in the pan and press on them a little bit. Cook for 3 to 4 minutes, until the fillets are nicely browned. Turn the fish over, turn the heat to medium-low, and cook a few more minutes, until it's almost cooked through. 


Be careful not to overcook the fish. When it's done, the fish will begin to flake and separate a little, and the center will be slightly translucent. Scatter half of the arugula over a large platter. Arrange the beets on top, and drizzle with half the horseradish cream.


Tuck the rest of the arugula among the beets, so you can see the beets peeking through. Nestle the fish in the salad, and spoon a little horseradish cream over each piece. Drizzle the whole dish with olive oil and a big squeeze of lemon.


Roasted Beets with Horseradish Creme Fraiche


  • 4 smallish bunches different-colored beets
  • 1/2 cup plus 2 tablespoons extra-virgin olive oil
  • 1 tablespoon diced shallot, plus 1/4 cup sliced shallots
  • 1 tablespoon plus 1 teaspoon balsamic vinegar
  • 2 tablespoons red wine vinegar
  • 2 1/2 teaspoons lemon juice
  • 1/2 cup creme fraiche
  • 1 tablespoon prepared horseradish
  • 1/4 cup heavy cream
  • Kosher salt and freshly ground black pepper


Preheat the oven to 400 degrees.


Cut off the beet greens, leaving 1/2 inch of the stems still attached. Clean the beets well, and peel with a vegetable peeler. Toss with 2 tablespoons olive oil and a teaspoon of salt.


Place the beets in a roasting pan with a splash of water in to bottom. Cover the pan tightly with foil, and roast for about 40 minutes, until they're tender when pierced. The roasting time will depend on the size and type of beet. When the beets are done, care fully remove the foil and allow them to cool. Cut the beets into 1/2-inch thick wedges.


While the beets are in the oven, combine the disced shallot, both vinegars, a teaspoon lemon juice, and 1/4 teaspoon salt in a small bowl, and let sit 5 minutes. Whisk in the 1/2 cup olive oil. Taste for balance and seasoning.


Whisk the creme fraiche and horseradish together in a small bowl. Stir in the heavy cream, remaining 1/2 teaspoon lemon juice, 1/8 teaspoon salt, and a pinch of pepper. Toss the beets and sliced shallots with the vinaigrette. (If you're using different-colored beets, dress them separately so that they don't discolor each other.) Season with 1/4 teaspoon salt and a pinch of freshly ground black pepper and toss well. Taste for balance and seasoning.


Here's a meal that I didn't mess up too badly (the rice was a tiny bit underdone, but it wasn't too noticeable):

This is one of Nick's favorite dishes, and it's in our regular rotation. It's relatively economical, and it's easy although it is a bit time-consuming. However, most of that time is not active time. It's spicy and satisfying, somewhat healthy, and the leftovers are delicious. We highly recommend that you try this meal.


Chicken and Brown Rice With Chorizo

  • 2 1⁄2 lbs. bone-in skinless chicken thighs
  • Kosher salt and freshly ground black pepper to taste
  • 2 tablespoons extra-virgin olive oil
  • 3⁄4 lb. smoked, dried chorizo, cut into 1"-thick slices
  • 2 tablespoons roughly chopped fresh oregano
  • 1⁄2 tsp. crushed red pepper flakes
  • 4 cloves garlic, crushed
  • 1 large yellow onion, thinly sliced
  • 1 bay leaf
  • 1 1⁄2 cups long-grain brown rice, rinsed
  • 1⁄2 cup white wine
  • 3 roasted red peppers, peeled, seeded, and cut into thick strips
  • 3 cups chicken broth
  • 1 cup frozen peas

Heat oven to 400°. Season the chicken lightly with salt and pepper. Heat the olive oil in a 4-quart dutch oven over medium-high heat. Working in batches, add the chicken and cook, without turning, until it's a deep golden brown, about 8 minutes.
Transfer the chicken to a plate and set aside. (Pour off and discard any accumulated fat and juices.) Add the chorizo and cook, stirring frequently, until lightly browned, about 5 minutes. Using a slotted spoon, transfer chorizo to a plate, leaving the fat behind in the dutch oven. Set chorizo aside.


Add oregano, red pepper, garlic, onion, and bay leaf to the dutch oven and cook, stirring occasionally, until onion is lightly browned and somewhat soft, about 8 minutes. Add rice and cook, stirring frequently, until surface is glossy, about 2 minutes.


Add wine, bring to a boil while stirring often, and reduce by half, about 1 minute. Nestle chicken, chorizo, and half of the peppers into rice mixture. Pour in broth and season liquid to taste with salt and pepper. Cover the dutch oven and bring to a boil over high heat. Transfer to the oven and bake until rice is tender and chicken is cooked through, about 1 hour and 10 minutes.


Remove the dish from oven, uncover, and gently stir in the peas and the remainder of the peppers with a fork. Let sit for 10 minutes, covered, to allow the flavors to meld.


Monday, January 25, 2010

Winter Salad, Casserole-Roasted Chicken with Peas and Bacon, Clarified Butter


I made another winter salad before dinner tonight. I had previously mentioned that Molly of Orangette discussed her version of a winter salad in this month's Bon Appetite. I was curious, and I had some celery root left over. Therefore, it was time to give celery root another chance. As I've mentioned, I like to try things a few times before deciding that I don't like them. It's a lot like getting kids to eat like real people--you apparently sometimes have to make them try a food up to twelve times.

Anyway, this salad was again composed of celery root, fennel, and apples that had been made into matchsticks with the scary, scary mandolin. Okay, so what's the deal with the mandolin, right? Well, have you ever cut yourself on one of those things? First of all, it's pretty easy to do. And because the blade is very sharp and it slices off a good portion of the tip of your finger or knuckle, the resulting cut bleeds forever. Ask Hunter--he once bled profusely all the way through dinner. It doesn't help that alcohol is an anti-coagulant, either.

I used to think that I was too cool for the hand guard, but after the fourth or fifth time that I had to quickly grab a paper towel in order to staunch the large amounts of blood oozing from my hand before everything around me was ruined, I decided that I'm not too cool at all. (I've also finally learned that I'm not too cool for the oven timer.)

Hunter will no longer use the mandolin, and Nick finds the mandolin so scary that he can't even watch me use it. He can't even watch the Iron Chefs
use it, and they kick ass. Yesterday, I hadn't yet put the mandolin back in its box after washing it, and Nick asked in a very anxious manner what it was doing out, because he doesn't like to be in its presence, and you better believe he's not going to attempt to wrestle that thing back into its home.


Tonight the matchsticks of fruits and vegetables were tossed with a dressing that contained mustard, salt, pepper, lemon juice, and walnut oil. It was supposed to be hazelnut oil, but Whole Foods didn't have any.

The verdict? It was pretty good, but I'm still not liking the raw celery root. I'm tempted to try it as a gratin, but is that cheating? Anything is good with lots of cream, butter and cheese, right?

The dressing was nice, but the nuttiness of my walnut oil did not shine through. Inspired by the lack of nuttiness, I threw some chopped pecans in there, and that was good. I may in fact make a salad consisting of fennel, apples, this dressing, and some pecans.

Or I might just eat the shaved fennel with lemon juice, olive oil, salt, and Parmesan, as I've previously mentioned. In fact, I've had this a couple times since making the celery root salad. Just so the apple doesn't feel neglected, though, it gets eaten with peanut butter as dessert.


Then it was time for the Casserole-Roasted Chicken with Peas and Prosciutto from Parisian Home Cooking. This recipe called for a 5 pound chicken, preferably with the feet still attached, to be placed in a Dutch oven with some melted butter.


I would just like to mention that I love love love my dutch oven.


A Le Cruset would be nice, but Cook's Illustrated says that the $40 version from Lodge is your next best option. Therefore, that's what I have, and it's just fine with me. This dutch oven transfers heat beautifully (almost too well sometimes), and you can make a delicious and easy meal by searing meat, adding some liquid directly to the vessel, and putting the whole thing in the oven to braise. The pot is pretty enough that the meal can be served in it, too.

Then when the meal is finished and you go to scrub the ominously cruddy bottom, it comes clean like magic, with a fraction of the expected scrubbing required. The dutch oven is also great for soups, mussels, and Jim Lahey's bread. That's another post, though.

So my 3 pound chicken Dutch oven "On one breast." What the hell does that mean, "On one breast?" Well, we kind of balanced it as well as we could, and into the oven it went.


A half hour later, we flipped it onto its other breast. Or what we thought was its other breast, as we had gotten kind if turned around while messing with it. A while after that, it was flipped over onto its back.


Once the chicken was overcooked, we took it out and allowed it to rest. At this point, the excess rendered fat was spooned out, and the shallots were sauteed. The recipe calls for four shallots, but what the heck does that mean? Do you know how much shallots vary in size? We erred on the side of abundance, as we like shallots.

Some creme fraiche and white wine went in there, as did some prosciutto. And no, that's not another one of my errors--the recipe really called for prosciutto. Why the title says bacon, I don't know. Perhaps prosciutto sounded too Italian, so they went with bacon.


I do have a confession to make. At this point, fresh sorrel was supposed to be added. Whole Foods didn't have it, and I'm not sure if I like it anyway. Not that I wouldn't have tried it, because you know how I harp on the subject of trying new or newish foods. If we make this again, I will certainly try to obtain some sorrel, mostly because Michael (the author) writes:

"What I like best about (this) improvisation is the sorrel, which tips the balance away from salty bacon and rich cream, cutting through and lightening the dish. Balance and subtlety is what French cuisine is all about."


The prosciutto cream sauce simmered for a while, the peas were added, and the chicken was carved and plated. Once the sauce was spooned over our legs and breasts, respectively, we pulled the baked potatoes out of the oven and dug in.


Wow, it was good. The cream sauce was tangy and satisfying without being too heavy, the prosciutto was wonderfully salty and flavorful, and the peas popped in the mouth while adding a pleasing freshness. Again--with cream and expensive cured pig product, how can you go wrong?


I mentioned that I overcooked the chicken, but it wasn't by much. And besides, since Nick prefers the white meat, only his was really overcooked, so whatever. I'm just kidding, Nick. 

This meal will definitely go on the repeat list, but if I'm feeling like a fatty, we'll stick with plain old roasted chicken. I used to think that I didn't really care for roasted chicken until I tried Thomas Keller's version. It's so simple, and so beautiful. All you do is dry it very thoroughly, truss it, and cook it at high heat "until it's done." I love that part--"until it's done." Thomas Keller doesn't need to be specific, because he's a mad genius. I also love his story of getting a knife thrown at him early in his career because he didn't know how to truss a chicken.


As Thomas Keller and numerous other people point out, one's ability to roast a chicken can serve as a true litmus test of their abilities as a cook. The same goes for cooking eggs, because the dishes that seem the easiest are often the ones that actually require the most practice, technique, and good judgement.

The butter that went into the dutch oven with the chicken was actually clarified butter. This was something that I had been meaning to make for a while, and I felt that this night would be a good night to do it. Not that it takes much effort or deserves any amount of procrastination. I had almost bought a jar of ghee (the clarified butter used in Indian cooking) at Whole Foods while buying the undersized chicken, but I convinced myself that I couldn't be that lazy.


The benefit of using clarified butter is its clean taste and its higher smoke point. With clarified butter, the milk solids have been removed. As these are what burn when you overheat butter, this allows the butter to be brought to a higher temperature. It is therefore better for pan-searing, and it lasts almost forever.


I followed Alice Waters' directions in order to make this culinary gold. The fact that they left me a bit confused from the beginning was probably a good indication that I should look elsewhere. Did I? No. I just overcooked my clarified butter.

This is what Alice Waters writes:

Melt butter in a small heavy pan over medium heat. Cook the butter until it has separated and the milk solids are just turning a light golden brown, about 10 to 15 minutes. Pour it through a strainer to remove the solids, leaving clear golden clarified butter.


A couple days later, I read this from Thomas Keller:


Put the butter in a small sauce pan and melt it over low heat, without stirring (I stirred it because I hadn't read this, and it was making some freaky noises). Skim off the foamy layer that has risen to the top and discard (I didn't do that). Carefuly pour off the clear yellow liquid (as you know, mine was not clear yellow), the clarified butter, into a container, leaving the white milky layer behind.


Although they pretty much said the exact same thing, Thomas Keller's directions somehow made more sense to me. Next time, I'm definitely going with the Mad Genius, even though I probably shouldn't even need a recipe for something so simple.


As I mentioned, the butter is supposed to remain golden in color, and mine is more like browned butter. But that's okay, as brown butter is delicious, and I'm sure that it will get used. The little crunchy milk solids will also get used somehow, as they are like crunchy little kernels of brown butter goodness. Once I get through this overcooked batch of clarified butter, I will definitely make another attempt. Wish me luck.


Casserole Roasted Chicken with Peas and Bacon
(From Parisian Home Cooking)

  • One 4 pound whole chicken
  • Salt and freshly ground black pepper
  • 3 tablespoons unsalted butter
  • 2 tablespoons olive oil
  • 2 cups fresh or frozen peas
  • 4 shallots, thinly sliced
  • 1/4 cup dry vermouth or white wine
  • 1/4 cup creme fraiche or heavy cream
  • 1/4 pound prosciutto or bacon, thinly diced

Preheat the oven to 475 degrees.
Rinse the chicken and pat dry, Season the chicken inside and out with the salt and freshly ground pepper. Turn the wings under the bird and tie the legs together. Melt 1 tablespoon butter in the oil in a Dutch oven. Lay the bird on one breast, cover, and transfer to the oven. Roast for 30 minutes.


Carefully turn the chicken onto its other breast, cover, and roast another 20 minutes. Turn the bird on its back, cover, and roast another 20 to 30 minutes, or until the juices run clear when a thigh is pierced. Transfer the chicken to a platter, cover, and keep warm.


Skim the fat from the juices in the Dutch oven and return it to low heat. If using fresh peas, add them now. Add the shallots and cook until soft but not brown, about 4 minutes. Add the vermouth or wine, creme fraiche or cream, and prosciutto or bacon, and cook until the liquid is reduced by half, about 4 minutes.


Pour any juices that have collected around the bird into the pot. Add the frozen defrosted peas, which only need to warm through.


Remove from the heat, swirl in the remaining 2 tablespoons butter (we actually left this out), and pour the sauce into a sauce boat. Serve immediately with the chicken.